Bring a little light into your life…

27 Jul

My son’s been away with his Daddy for a couple of nights so I took the opportunity to catch up on lots of sleep and satisfy my craft addiction. It’s also been a good distraction as I’m missing the little chap soooooooo much! I had seen these paper lanterns before and loved their simplicity and the way the light shines through the slits in the paper.

These lovely designs are by Jurianne Matter, available to buy from Berry Red and also available via Not On The Highstreet.

It’s a commonly used design so I set about figuring out how to make them.  Conclusion:  they’re very, very easy!  Here’s a simple tutorial:

1. Cut a piece of A4 card in half

2.  Fold in half lengthways

3.  Turn upside down and fold about 2 cms in from each edge so you have something like this:

4.  Next, measure and mark 2cm sections across the piece of card, as shown below.  You should end up with a spare 1cm at the end.  For extra accuracy in step 5, turn the card round and do the same on the bottom half.

5.  Next, cut slits from the top fold to the bottom fold, aligning up your 2cm markers. Of course you could just use scissor for this, but I’m a bit of a perfectionist when it comes to this sort of thing and like complete accuracy!

6.  Decorate as you like, bend the lantern into shape, and then use a piece of double-sided tape or glue to secure it.  Unfortunately I didn’t get a pic of this last bit, but it’s pretty obvious…

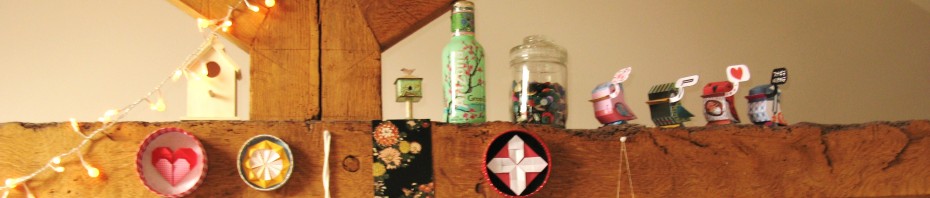
Voila!  There you have your snazzy new paper lantern!  These lanterns should fit a slim highball glass which you can put a tea light in.  They’d look lovely in the garden on a summer’s evening.  You can really play around with the design too  (as long as whatever you use is thin card).  Here’s some I made earlier…

My mum runs the local Brownies and I offered to come in to make some lanterns with them.  They totally loved them!  I gave them some paper embellishments so they could make them their own.  Some of them added messages along the top and bottom to give them as presents.  One little girl wrote ‘”to my best friend in the world, please play with me more'” which made me want to cry!  I ended up being Agony Aunt Shiv and mediating a bitter squabble between two 8 year olds.

Anyhoo, I decided to give them bits of thread to hang their lanterns with, instead of glasses and tea lights as I anticipated that brownies + encouraging the use of fire = kids being harmed and Shiv being sued.


Japanese washi masking tape rules!

27 Jul

I have recently discovered this gorgeous Japanese washi masking tape.  I have seen it about here and there, but never paid that much attention to it, UNTIL NOW!  And I have totally been missing out!  This Japanese tape is made from traditional washi paper, it’s removable and replaceable, and comes in an extensive array of colours, patterns and widths.  It can be used for loads of different craft projects to add a splash of colour quickly and simply, and as an added bonus it’s super duper cheap!  I just went a bit mad and spent a small fortune, but really got my money’s worth! Feast your eyes on these…

Don’t they just make your mouth water?!  I can’t wait for them to arrive and I can get experimenting.  The pics above are from happy tape where you can purchase (USA company), but I bought mine from cute tape (another US company).  Here are some random pics of some projects I found online to help get your creative juices flowing…

As easy as ABC

15 Jul

I always find myself drawn to alphabet themed craft projects, or anything ‘alphabet’ really.  I have indulged in many an alphabet-happy craft project in the past, but here are a couple of my more recent creations:

I made this decoration for my son’s crib using some lovely fabrics (spotty fabric on the left from Amy Butler) and wadding.  They’re a little rough around the edges, but I see no harm in that!  Find the tutorial over here (see ‘plush alphabet magnets’).  Obviously I didn’t use magnets, instead I hung them on some pretty baker’s twine using a selection of ribbon from Ribbon Oasis.  The horsey ribbon on the left is just so adorable!  I used letter templates downloaded from here.

I made this funky picture the other day – origami letters and numbers.  The bright colours of the paper against the black background give it that blackboard feel which I’m really pleased with.  I wasn’t sure about the pale turquoise frame at first, but the juxtaposition has really grown on me!  I used the excellent (and simple to follow tutorials from Fun Origami ( this site seems to be a bit temperamental and prefers to work in the day time for some reason).

I have also added these to my ever-growing wish list of alphabet excellence:

This incredible alphabet pop-up book from Present&Correct is bursting with clever and imaginative designs.  Each page delivers a different and fascinating letter; I especially like the ‘U’ pictured above.  How the hell did they do it?!

I also found these alpha-tastic gift wraps from Paper Source ( the first is from Sukie, and the second from Cavallini).  They can be easily framed to make an impressive and unusual picture on the cheap!

Another great purchase I made several months ago are these alphabet stamps from Berry Red. I hunted for a long time for a good set of alphabet stamps, but they were so expensive (generally £25 upwards) and it was hard to find a font I liked.  But then I stumbled upon these for only £14.50!  The font is lovely – an old classroom upper case type which includes punctuation stamps.  They come with a handy blue ink pad which is very good and the box is covered with delightful quotes and sea themed design. I’ve used them for many a project so far – gift labels, cards, wall art etc.  Definitely worth it!

Current obsession: Candy stripes!

12 Jul

I have realised what has been missing from my craft life all these years:  CANDY STRIPES!!!  They bring to a project a touch of childhood magic, a whiff of whimsical charm that only, well, candy stripes can deliver!  Think old school sweet shops, think traditional barber shops and milkshake bars. Mmmmmmm, delicious.  Being the neurotic shopper that I am, I’m holding out on buying any candystriped treats as of yet until I find the best bargain and the yummiest products out there.  Whet your appetite with these lovelies…

Another beautiful creation from Olivia Kanaley over at a field journal

Adorable yellow bags found here on Etsy.

Try making these gorgeous Martha Stewart candy striped cookie sticks for yourself!

I will definitely be buying these versions of candy striped paper bags (possibly in each colour!)

Another Etsy find, this time from fort & field.

I’m throwing a baby shower for my sister next month and am trying to think of ways to shoe-horn candy stripes into the event any way I possibly can!

There are some changes afoot…

12 Jul

Firstly, thank you for popping along to my new blog.  I hope you like what you see here and will swing by again in the future!

I’m moving into my new home in a few weeks and I cannot wait! It’s a lovely 3 bed new build in my local town.  It’s already 3 months overdue so I have had plenty of time to plan how I want each room to look.  I’ve been scouring the shops for  lovely new things which I, ahem, “need”.  It’s an inspiring project which I will be reporting back on as I go.  Here’s a few of my favourite buys so far…

I bought this funky doormat from Amazon here.  What an amorous welcome to my new home!

It took me a long time to find the right cutlery set, but when I saw this I totally fell in love!  Each piece is completely different and it’s a fun way to brighten up the dinner table!  The only downside is that it’s only a 16-piece set so I’m considering buying another one.  The set is brought to us by ‘Present Time’ (also retailing as ‘PT’), a Dutch company who make some well designed quirky and unusual homewares and gifts such as this and this.  I have searched and searched for other retailers, but I’ve found that Amazon seems to be the best place to shop for their stuff.

Inspired by this child’s bedroom (courtesy of  Emily Henson, prop stylist and decorator extraordinaire via design*sponge) I have decided to transform my son’s new nursery into…well I’m not too sure what exactly yet, but will keep you posted.  I love love love the decorated birdhouses and have already set about making my own for the nursery.  I wanted a selection of different sized and shaped birdhouses and after lots of hunting I have bought 4 of these from Sainsbury’s online (I got them for a bargain £2.49 each as they were discounted a few weeks ago), also 2 of  these from trusty old Amazon.  Watch this space!